

Table of Contents
- Step 1: Choose the Right Dog Prints for Your Gallery Wall
- Step 2: Plan Your Gallery Wall Layout
- Step 3: Explore Dog Gallery Wall Ideas for Different Spaces
- Step 4: Prepare Your Photos for Printing
- Step 5: Add Dog Paw Print Wall Art for Personal Touch
- Step 6: Hang Your Gallery Wall Safely
- Frequently Asked Questions
Last Updated: October 14, 2026
Step 1: Choose the Right Dog Prints for Your Gallery Wall
Learning how to create a gallery wall with dog prints starts with one question: which photos deserve wall space? A gallery wall is a story about your dog, so the pictures matter more than the frames. At Island Dogs, we think every rescue dog has a story worth showing off, and the best displays start with images that capture real personality, not just good lighting.
Most people grab ten cute photos and end up with a wall that feels busy instead of meaningful.
Selecting Your Hero Shot and Supporting Images
Pick one hero shot first. This is the single best photo of your dog, and it anchors the whole display.
A good hero shot usually shows:
- A clear view of your dog's face and eyes
- One strong expression or moment
- Enough contrast to stand out from a distance
Then choose supporting images that fill in the rest of the story. Think about a mix of close-ups, action shots, and quiet moments. If you have multiple pets, give each dog at least one strong photo so the wall feels fair and complete.
Step 2: Plan Your Gallery Wall Layout
A gallery wall layout is the plan for where each frame goes, how big it is, and how the group balances. Get this right on paper and hanging becomes easy.
Measure the wall before you choose a single frame
Start with three numbers:
- Available width, measure the wall, then subtract at least 15 cm on each side so the group doesn't crowd corners or doorways.
- Available height, measure from the top of any furniture (sofa back, console, headboard) to the ceiling, then subtract 20-25 cm at the top for breathing room.
- Viewing distance, stand where you'll normally look at the wall and note how far away you are. This decides your largest print size.
Keep the whole arrangement inside a rectangle roughly 60-75% of the available wall width. That leaves visual margin and stops the display from feeling like wallpaper.
Set the center line at eye level
Hang the center of the arrangement at roughly 145 cm (57 in) from the floor, the standard museum height. Adjust for your household: if everyone is tall, 150-155 cm feels better; in a kids' room, drop to 120-130 cm.
If the wall sits above furniture, don't float the art. Leave 15-25 cm between the bottom of the lowest frame and the top of the sofa, console, or headboard so the group reads as connected to the furniture rather than lost above it.
Use the paper-template method
This is the lowest-risk way to hang a gallery wall:
- Cut paper or newspaper to the exact size of every frame.
- Tape the templates to the wall in your planned arrangement.
- Step back, photograph the wall, and live with it for a day.
- Mark the hanging point on each template, for a wire, that's the top of the wire pulled taut; for a sawtooth or D-ring, it's the hardware position.
- Measure from the top of the template down to that mark, then transfer the same measurement to the back of the real frame.
- Drill or place hooks through the template, peel the paper away, and hang.
This lets you test spacing, height, and balance without unnecessary holes.
Spacing rules that actually hold up
Consistent spacing makes a display look intentional. These numbers work across most rooms:
- Leave 5-8 cm (2-3 in) between frames in a tight grid.
- For a looser, more gallery-like feel, widen to 8-12 cm, but keep it identical everywhere.
- Align the outer edges of the group so the whole arrangement forms a clean rectangle.
Adapt the plan to the wall you actually have
- Narrow hallway: one row of 3-5 same-size frames, centered at 145 cm, spaced evenly. Avoid staggering, there isn't room for it to read.
- Small room: a tight 2×2 or 3×2 grid of small prints. Fewer, larger pieces beat many tiny ones in a cramped space.
- Staircase: follow the slope with the bottom edge of each frame, keeping vertical spacing constant. Hang so the art is visible from the bottom of the stairs, not the top.
Try a layout planner app, with realistic expectations
A gallery wall layout planner app lets you upload photos and test arrangements before you touch a nail, dragging and resizing frames and comparing finishes and print sizes.
Treat the app as a first draft. Screens flatten perspective, so a layout that looks balanced on a phone can feel top-heavy in a real room.
Step 3: Explore Dog Gallery Wall Ideas for Different Spaces
Not every wall needs the same plan. The best dog gallery wall ideas match the room and the way you live in it.
Try these setups:
- Stairwell: a stepped arrangement that follows the slope
- Living room: a large grid centered above the sofa
- Bedroom: a small cluster of three to five calm portraits
If you rent or stay somewhere for a short season, like a week on Kelleys Island, a light cluster of small frames works well and comes down easily. For a year-round home, go bigger and build a full wall.
Step 4: Prepare Your Photos for Printing
Print quality decides whether your wall looks sharp or soft. A photo that looks crisp on a phone can turn muddy at 8×10, and the difference is almost always in the file, not the frame. Here is how to prep each image.
Check resolution before anything else
Print resolution is measured in pixels, and the rule of thumb is 300 pixels per inch (ppi) for a sharp print viewed up close. That means:
- A 5×7 in print needs about 1500 × 2100 px
- An 8×10 in print needs about 2400 × 3000 px
- A 16×20 in print needs about 4800 × 6000 px
Most phone cameras shoot above these numbers, so the problem is usually cropping. Crop a 12 MP photo to a tight headshot and you may fall below the threshold. As a fallback, 150 ppi is acceptable for prints viewed from a few feet away, which covers most gallery walls.
Crop for the frame, not the phone
Decide the frame shape first, then crop to it:
- Square frames suit tight headshots and paw-print art.
- Portrait (4:5 or 2:3) works for sitting or standing poses.
- Landscape (3:2 or 4:3) suits action shots and dogs in motion.
Keep your dog's eyes in the upper third of the frame, that's where viewers look first. Leave a little headroom above the ears so the crop doesn't feel cramped.
Fix lighting and color before you order
Screens are brighter and more saturated than paper, so photos often print darker and flatter. A few adjustments close the gap:
- Brightness: lift shadows slightly, but don't blow out highlights on a white or cream dog.
- Contrast: add a small amount so the dog separates from the background.
- White balance: correct any yellow or blue cast from indoor lighting. Warm indoor shots often print too orange.
- Sharpness: apply a light sharpen, not a heavy one, over-sharpening shows up badly in print.
If you're not comfortable editing, most print labs offer auto-correction at checkout, fine for casual prints, but for a hero shot do it manually or ask the lab to leave it uncorrected.
Choose color, black-and-white, or illustrated
Each treatment changes the mood of the wall:
- Color feels warm and personal, and works best when your photos share a similar palette. Mixed color temperatures across frames look chaotic.
- Black-and-white unifies mismatched photos, different lighting, different rooms, different seasons, into one cohesive set. It's the easiest way to make a gallery wall look intentional.
- Illustrated or painted portraits add a stylized, timeless feel and hide low resolution or busy backgrounds. They're a strong choice for a hero shot when the original photo isn't print-quality.
A common pattern is one color hero shot surrounded by black-and-white supporting images, or the reverse. Pick one treatment as the anchor.
Match print size to viewing distance
The bigger the print, the farther away it should be viewed.
- Hallway or desk area (viewed from 1-2 ft): 4×6 to 5×7
- Living room wall (viewed from 6-10 ft): 8×10 to 11×14
- Large open wall or above a sofa (viewed from 10+ ft): 16×20 and up
Small frames suit close-up spots; large prints belong on big open walls. Mixing sizes works, but keep the largest piece as the focal point.
Pick paper and finish to match the room
- Matte cuts glare and suits soft, warm photos. Best for rooms with lots of windows or overhead lights.
- Glossy adds punch and deeper blacks but shows reflections and fingerprints.
- Luster / satin sits between the two and is the safest all-round choice for a gallery wall.
Always order a test print first
Order one small print of your hero shot before committing to the full set, and check it under the actual lighting of the room where it will hang. If the color, brightness, or crop is off, you've spent a few dollars instead of reordering an entire wall.
Step 5: Add Dog Paw Print Wall Art for Personal Touch
Dog paw print wall art adds a personal touch photos alone can't match. A clay impression, a painted print, or a simple paw-print design ties the wall together.
Make a paw print at home with pet-safe clay or washable paint.
This is also where a rescue story can shine. A small note about where your dog came from, tucked into the corner of a frame, turns a picture into a memory.
Step 6: Hang Your Gallery Wall Safely
Safe hanging protects your art and your walls. The right method depends on your wall and whether you rent.
Use this quick guide:
| Wall Type | Best Method | Renter-Friendly? |
|---|---|---|
| Drywall | Picture hooks or anchors | Yes, with small hooks |
| Plaster | Adhesive strips or hooks | Yes |
| Brick or concrete | Masonry anchors | No, needs drilling |
| Rental | Adhesive strips and light frames | Yes |
Measure twice before you drill. Mark each spot, check it with a level, then hang. For heavy frames, use two hooks so the frame can't tilt.
If you rent, adhesive strips and lightweight frames let you build a full display and take it down without damage.
Frequently Asked Questions
Is there an app to design a gallery wall?
Yes, several apps help you plan a dog prints gallery wall before hanging anything. Apps like Gallery Wall Planner and iScape let you upload photos, choose frame sizes, and see the layout on your actual wall using your phone camera. You can also use free tools like Canva or even a simple grid on paper. The key is to test spacing and balance digitally first, so you avoid unnecessary nail holes and get the arrangement right the first time.
How far apart should frames be on a gallery wall?
Aim for 5 to 8 centimetres (2 to 3 inches) between frames. This spacing keeps the group visually connected without looking cramped. For larger walls, you can go up to 10 centimetres (4 inches), but consistency matters more than the exact number. Measure once and use that same gap throughout your dog prints gallery wall. If you are mixing portrait and landscape orientations, keep the outer edges aligned to maintain a cohesive display.
How do you make dog paw painting art?
Making dog paw print wall art is simple and safe. Press your dog's paw into a shallow dish of pet-safe, non-toxic paint, then gently press it onto acid-free paper or canvas. Wash and dry your dog's paw immediately with a damp cloth and dog-safe soap. For a cleaner look, use a brush to apply paint only to the paw pads. Let the print dry completely, then frame it alongside your photos for a personal touch in your gallery wall.
How do you create a mixed gallery wall with dog prints?
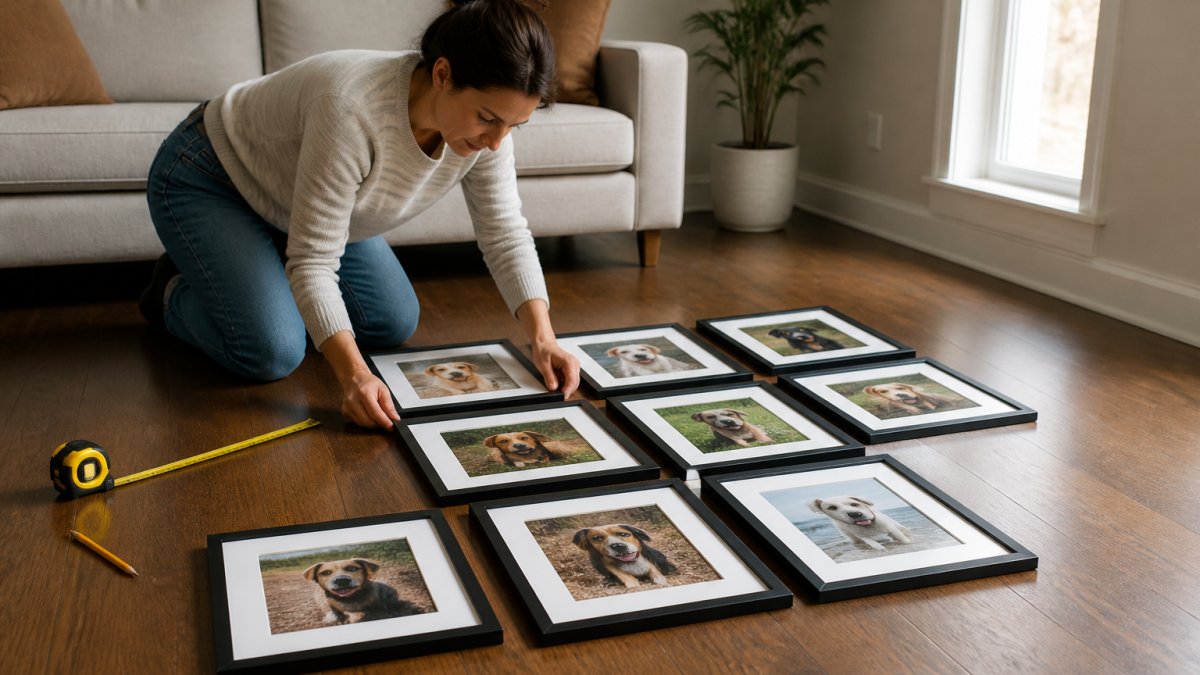
Mix dog prints with other wall art by keeping a consistent colour palette or frame finish. Use a statement portrait of your dog as the focal point, then balance it with smaller landscape-oriented prints, paw print art, or even a favourite family photo. Vary the frame sizes but repeat one element, like black frames or white mats. This creates visual interest without chaos. Lay everything on the floor first to test the arrangement before you hang anything.
Building a gallery wall takes planning, but the payoff is a space that tells your dog's story every day. At Island Dogs, we make that easier with wall art and apparel inspired by rescue dogs, and we donate 15% of net proceeds to local groups that help dogs find loving homes. Explore our collection to celebrate the bond you share, and let your wall show the happiness your four-legged friend brings. Get started with Island Dogs and turn your favorite photos into a display worth showing off.